How to install wine pegs

*Pictures are renderings. Actual wine racks may look different
A well-planned wine peg display begins with solid backing, not just a carefully arranged pattern. Learning how to install wine pegs starts with choosing a suitable mounting surface: for a standard panel installation, use a ¾-inch panel and a hand drill, with hanger bolts recommended. Plan two pegs per bottle, allowing at least 5.75 inches between matching peg positions vertically and about 13 inches between adjacent 750 ml bottles horizontally.
The clean, floating look is part of the appeal, but the layout also needs to support each bottle and leave room to place and remove it. This guide walks through preparing the wall, choosing backing support, marking peg positions, and allowing clearance around bottles and nearby walls. You'll also learn when a panel, wall blocking, or a smooth stone surface affects the installation approach, so the finished display feels considered as well as practical.
Key Takeaways
- Choose backing that can support the display; for layouts holding 100 or more bottles, plan plywood backing between wall studs.
- Map each bottle position before drilling, leaving room for the bottle body, neck, and nearby walls.
- Use a ¾-inch panel and hand drill for a standard panel installation, with hanger bolts recommended.
- Match the mounting method to the surface: wine pegs are not intended for drywall or glass, while stone installations call for a threaded stud and insert method on a flat, smooth surface.
- Consider whether a peg layout or rail-based arrangement better suits the wall, bottle mix, and overall display plan.
Table of Contents
Backing support for large installations
Plan the support before marking peg positions, especially for a display holding 100 or more bottles. A continuous backing surface helps anchor the layout instead of relying on drywall alone.
Prepare backing for large installations
For a display of 100 or more bottles, plan plywood backing between the wall studs before finishing the wall. Where site conditions call for added support, use horizontal wood blocking between studs. First map the display area and locate the studs; then coordinate backing placement with the intended peg positions. Avoid laying out a large installation before deciding how its backing will connect to the wall structure.
- Mark the display area. Draw the intended wine peg field on the wall, including its outer edges. This gives you a defined zone for locating studs and planning plywood or blocking.
- Locate the studs. Identify where the wall framing sits behind the display. Use those positions to plan plywood backing between studs, rather than treating drywall as the structural support.
- Plan blocking where needed. Add horizontal wood blocking between studs when the site conditions call for it. Position backing to support the planned peg field, not just an isolated part of the display.
Mount pegs to wood or wall backing
Mount each peg into suitable wood backing, using a method designed for the surface. For a standard panel installation, use a ¾-inch panel and hanger bolts, with a hand drill. Make sure the panel or wall backing is in place before drilling. A decorative wall finish is not a substitute for wood support.
- Choose the mounting surface. Use a ¾-inch panel for a standard panel installation, or plan the pegs to meet wood backing within the wall. Keep the attachment points aligned with the prepared support.
- Mark each peg position. Transfer the approved layout to the panel or backing before drilling. This keeps the mounting points consistent with the bottle arrangement and avoids placing a peg where support is absent.
- Install with the recommended hardware. Use hanger bolts for standard panel mounting and a hand drill for installation. Seat each peg in the wood backing, then inspect the mounted row before loading bottles.
For a large wall display, plan the backing before installation, not as a finishing detail. Decide how the pegs will be supported before drilling the pattern.
Plan the backing and peg layout together. Wine Pegs recommends reinforcing walls with horizontal wood blocking between the studs, depending on site conditions. Blocking may be appropriate for some displays, but it is not an automatic step for every installation. Decide whether it is needed while planning the support, before setting peg positions.
Keep the planned peg field in view when deciding where reinforcement belongs. The backing should correspond with the display area, keeping the mounting and support plans aligned. If horizontal blocking is appropriate, account for it before finishing the wall or drilling. Settle on the support method before transferring the final peg layout, so the pattern does not rely on locations without the planned backing.
Planning peg layouts and bottle clearance
Lay out each bottle position before drilling, using bottle size and wall clearance to guide the pattern. A typical 750 ml bottle uses two pegs and needs room to sit securely and come away from the wall. For anyone learning how to install wine pegs, measuring actual bottles before marking the layout helps account for differences in shape.
- Measure a representative bottle. A 750 ml wine bottle is approximately 12 inches long, but shapes can vary. Use a bottle from your collection to judge how far it projects and where its neck and base will rest.
- Set the horizontal spacing. Leave enough space between adjacent bottles to keep them from touching. Mark those centers on the wall, then compare the spacing with your actual bottles so neighboring bodies have room.
- Plan vertical rows. Leave at least 5.75 inches between matching peg positions in adjacent rows. Choose 7 to 8 inches when you want more room or need to accommodate larger bottles. Apply the same spacing across the layout for orderly rows.
- Allow side clearance. Keep approximately 3 to 4 inches between a bottle neck and a side wall. Measure from the neck's position, not only from the paired pegs, because bottle shape affects its outer edge.
- Position each pair for bottle support. Use two pegs per bottle, one supporting the base and one the neck. For label-forward storage, arrange the bottle so about two-thirds of its weight rests on the base peg and one-third on the neck peg.
- Mark and review the full pattern. Draw the bottle outlines or center marks before drilling. Check the top, bottom, and side boundaries, and make sure rows preserve the planned clearance. A display with 160 metal pegs can still look visually clean when its pattern is consistent.
- Test support after installation. Place one bottle on its pair of pegs before loading the rest of the display. Check that it sits horizontally, stays supported at the base and neck, and can be lifted away without catching a neighboring bottle. Repeat the test at different positions, including an outer row.
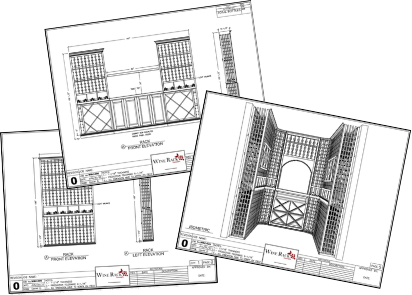
Applying these measurements is a practical part of how to install wine pegs, especially when bottle sizes vary across the collection. For a large or irregular bottle collection, a Wine Rack Concepts, LLC cellar design plan can help bring bottle positions and clearance into one coordinated layout before drilling.
Tools and preparation for installation
Gather the tools and hardware before laying out the first peg. A ¾-inch panel installation uses a hand drill, and hanger bolts are recommended.
- Set out the installation tools. Prepare a hand drill, measuring tape, pencil, level, and straightedge. Keep the wine pegs and hanger bolts nearby, so you can compare each component during setup. Use the measuring tape to transfer the layout, then use the level and straightedge to keep reference lines consistent across the panel.
- Check the panel and hardware. For a standard panel installation, use a ¾-inch panel and the recommended hanger bolts. Lay out the pegs and bolts on a clear work surface before starting. Compare the number of pegs with the planned positions, and keep the hardware grouped so small parts don't get mixed into other tools.
- Clear and inspect the work area. Remove objects that could obstruct the drill or panel. Check the panel surface for marks, damaged areas, or uneven edges that could affect the layout. Keep the reference drawing or measurements visible beside the work area, so you can compare each mark with the plan rather than relying on memory.
- Choose a reference edge. Select one straight edge of the panel as the starting point for measurements. Use a pencil and straightedge to establish clear guide lines before marking individual peg locations. A consistent reference edge helps keep rows aligned, especially when the display spans a broad panel or includes several rows.
- Transfer the layout carefully. Mark each peg position from the planned arrangement, then compare the marks with the bottle positions. Check that paired pegs are correctly oriented for each bottle. Pause before drilling if a mark conflicts with the panel edge or an adjacent position; revise the layout first instead of shifting pegs mid-installation.
- Prepare for controlled drilling. Place the panel securely on a stable work surface, with the marked face accessible. Hold the hand drill in line with each mark, and keep the hanger bolts organized within reach. Work through the layout in a consistent order, such as one row at a time, to reduce missed positions.
- Review the setup before mounting. Compare the marked panel with the layout once more. Confirm that each planned peg has a corresponding mark and that the hardware is ready for installation. Keep a sample bottle nearby for a later fit check, but leave the remaining bottles away from the drilling area until the pegs are mounted.
Wall material and mounting safety
Identify the mounting surface before choosing hardware. Wine pegs are not intended for drywall or glass. Stone, granite, and rock require a threaded stud and insert method.
- Identify the actual surface. Determine whether each planned peg location meets wood backing, drywall, glass, stone, granite, or rock. A decorative finish can conceal a different material beneath it, so base the mounting decision on the surface the rod will enter, not appearance alone.
- Stop if the planned point is drywall or glass. Wine pegs are not intended for direct installation into either material. Don't treat a drywall or glass face as interchangeable with wood backing or stone. Reconsider the display location or backing plan before marking the peg positions.
- Use the wood-backed method only where wood supports the peg. Align the planned peg locations with the wood panel or wall backing prepared for the display. Keep each mark within that supported area. A finish layer over a wall does not, by itself, establish that the peg meets wood.
- Prepare stone, granite, or rock for the correct attachment. Use the threaded stud and insert method for these materials. Keep the rod's intended mounting point on a flat, smooth surface. Do not place a rod where an uneven face prevents that surface contact.
- Inspect the surface at every marked location. Review the complete peg pattern, not only its first position. Check whether each mark meets the material planned for its mounting method. If the wall changes from wood backing to stone, treat each area according to its substrate.
- Keep the layout and surface method aligned. Compare the peg marks with the wall material before drilling. For example, a row crossing from a wood-backed section onto granite needs the appropriate attachment method at each surface. Don't assume one method suits the whole row.
- Pause when the surface is uncertain. Reassess the location rather than improvising a mounting method for drywall, glass, or an unidentified substrate. The material determines which installation approach applies, and the stone method depends on a flat, smooth mounting face.
- Review the completed mounting points. After installation, inspect each rod for consistent placement and contact with its intended surface. Check stone, granite, and rock locations for flat, smooth contact. Review wood-backed points against the planned marks before arranging bottles on the display.
Wine Pegs advises against installing its product into drywall or glass. Keep that restriction in view when deciding where the display belongs: if a proposed mounting point is either material, do not proceed with the peg there. A finish or nearby supporting material does not change what the peg would enter at that specific point. If the substrate cannot be identified with confidence, leave the location unresolved until it can be assessed; do not substitute an assumed method.
Apply the chosen mounting approach only to points whose surface has been identified. Recheck the intended peg locations against the material beneath any finish, and revise the pattern if it reaches a surface unsuitable for the planned method. Keep the distinction between a confirmed mounting surface and an uncertain one clear before proceeding. The wall's appearance alone should not settle the decision; when its material is unclear, pause rather than proceed on assumption.
Pegs rails
Decide whether a rail-based layout suits the wall before marking individual peg positions. A rail can align multiple bottle supports along a shared mounting line, but the attachment method depends on the rail design.
- Choose between individual pegs and a rail. Use individual pegs when you want to position bottle supports separately across the display. Consider a rail when a continuous horizontal line better fits the wall or visual plan. Compare both arrangements against the room, bottle collection, and intended display pattern before committing to mounting points.
- Identify how the rail accepts its pegs. Examine the rail and its installation information to determine whether pegs fit designated openings or use another attachment method. Don't assume every rail accepts every peg. Match the components as a system, and avoid drilling new openings or altering the rail without instructions for that specific design.
- Map the rail position against bottle rows. Mark where each rail would sit, then sketch the bottle positions it must support. A rail placed too high or low can shift the intended bottle presentation. Include the base and neck support points in the drawing, and compare the resulting arrangement with the bottles planned for display.
- Plan the rail's wall attachment separately. A rail doesn't remove the need for suitable backing or a mounting surface appropriate to its hardware. Determine where the rail meets the wall, then align its attachment points with the prepared support. Don't rely on the rail's length alone to establish that the wall can support the display.
- Keep adjacent rails aligned. For a display with multiple horizontal rails, use a consistent reference line and compare each rail's position with the layout drawing. Check the ends and center before securing the next rail. This helps prevent a gradual shift that could make bottle rows appear uneven across the full display.
- Test one bottle position first. After mounting a rail and fitting its intended supports, place one bottle in the planned position. Inspect how it rests and whether it can be removed without striking nearby supports. Repeat the test at an outer position, where the rail's alignment and clearance are easy to assess.
- Finish the pattern only after the test. Once the sample position works, continue across the planned rail layout. Keep the same component arrangement from row to row, and pause if any peg feels loose or the bottle sits differently than expected. Resolve that point before adding more bottles.
Wine Rack Concepts: Wine Cellar Cooling
Wine Rack Concepts, LLC can help coordinate a wine peg display with a broader cellar plan. If the display is in a dedicated wine cellar, Wine Cellar Cooling can address the room's climate-control needs alongside storage planning. For a project that calls for a coordinated room and display, Custom Wine Cellar design brings those elements together. The Wall Wine Rack Series and Classic Series offer additional storage options to consider as the layout develops.
Turn to Wine Rack Concepts, LLC when your installation is part of a larger cellar or when cooling needs to be planned alongside storage. Visit winerackconcepts.com or contact Wine Rack Concepts, LLC to discuss your project.
Shape the display around your collection
A thoughtful approach to how to install wine pegs starts with the space and the bottles you want to showcase. Consider how the display will fit the room's design and whether it is part of a larger cellar project. Wine Rack Concepts, LLC offers wine racks, Wine Cellar Cooling, and Custom Wine Cellar solutions to connect bottle presentation with the wider storage environment.
If your plans are still taking shape, refine the display concept before settling on an arrangement. A coordinated design can bring storage and cellar features together while keeping the focus on your collection.
With a clear plan, you can create a display that feels considered, functional, and distinctly yours.
Have an expert help today!
Free 2D wine cellar design