How to Choose a Solid Wood Backing Panel for Metal Wine Pegs

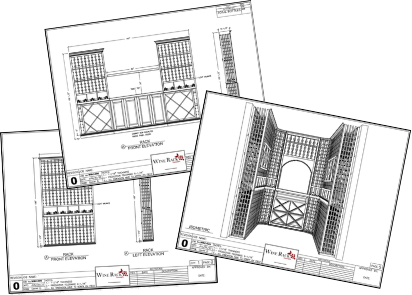
*Pictures are renderings. Actual wine racks may look different
The backing panel is more than a backdrop: its thickness and layout help determine how the finished wine wall works. A solid wood backing panel for metal wine pegs should be at least half an inch thick when the pegs screw directly into it. Plan the overall depth for bottles arranged one, two, or three deep, with about 3-4 inches of clearance between bottle necks and a side wall.
It's natural to focus first on the wood's appearance and how the bottles will be displayed. A well-planned panel also needs to provide a suitable mounting surface and enough room for the bottles.
This guide explains how to choose panel depth, coordinate the finish with the room, and plan a custom layout. It also covers the minimum wood thickness and wall support needed for installation, helping you create a display that suits your collection and space.
Key Takeaways
- Choose single-, double-, or triple-bottle depth based on the display you want and the room available in front of the panel.
- Allow about 3-4 inches between bottle necks and a side wall so the layout has practical clearance.
- Coordinate the panel material and finish with the surrounding space while keeping the peg layout and mounting needs in mind.
- Use solid wood at least half an inch thick for pegs screwed directly into the panel, and plan secure wall support for the loaded display.
- Account for the combined weight of the bottles when planning panel support; each full 750 ml bottle weighs roughly 2.5 to 3.5 pounds.
Table of Contents
Backer-panel depth and room clearance
- Choose the bottle depth before positioning the panel. Metal wine pegs can be arranged for single-, double-, or triple-bottle storage. A single-deep layout keeps the display closer to the wall, while deeper arrangements project farther into the room. Decide how many bottles each position should hold, then use that choice to plan the display's overall depth.
For a sense of projection, each peg is 6.25 inches long. With 3/4 inch inserted into the panel, 5.5 inches projects beyond its face. That is the peg's projection, not the total space required by bottles arranged two or three deep. Choose a solid wood backing panel for metal wine pegs with the full bottle configuration and room depth in mind.
- Measure the side clearance at the bottle necks, not just at the panel edges. Leave about 3-4 inches between the necks and a side wall. This space helps prevent a bottle from crowding the corner and gives the display a more deliberate visual boundary. For an alcove, include that allowance on both sides when planning the usable width.
Then mark the planned display width and the bottle positions across it. Label-forward layouts commonly use about 13 inches from center to center between adjacent 750 ml bottles. Use that spacing as a planning reference, and keep the side-wall allowance outside the first bottle's position. A narrow corner may therefore limit the number of bottles across the panel.
- Plan vertical spacing from the bottle and peg positions. Wine-peg rows should have at least 5.75 inches of vertical spacing between the same peg positions. Rows are often spaced about 6 inches vertically as a comfortable minimum. Mark a sample pair of rows on the panel plan before repeating the pattern across the full display.
For label-forward storage, each bottle rests on two pins, one beneath its base and one beneath its neck. Align each pair with the bottle's intended horizontal position. A paper or digital layout helps you see how rows, labels, and nearby walls interact before drilling.
- Plan for installation access as well as the finished projection. Without an Ultra Insert, installers need access behind the panel to attach the wine pegs. A panel mounted flush to a wall can block that access, so plan the attachment sequence before deciding how the backing will sit. This matters especially for a wide display that would be difficult to remove or reposition.
For example, a single-deep layout on a narrow feature wall can create a close-to-wall appearance. A triple-deep display needs more space in front of the panel, so plan around nearby furniture and walkways. Consider peg projection, bottle depth, side clearance, and installation access together. Then position a solid wood backing panel for metal wine pegs to suit both the display and the room.
Background materials and finishes
Metal wine pegs can be installed in wood panels or drywall; plywood is one type of wood panel. Solid wood can split around drilled holes or warp as moisture changes, so material condition, hole placement, and installation method all matter.
- Choose the backing material to suit the wall and peg installation. Wood panels provide a fastening surface, and wine pegs can also be installed in drywall. Plywood is one wood-panel option, but both the panel and its attachment to the wall affect the finished installation. Consider how the panel will be supported, not just how its surface looks.
For a collection display, keep the panel material consistent across adjoining sections where possible. A continuous face gives the peg layout a cohesive look, while separately finished panels can make seams more noticeable. Consider both the planned peg positions and the appearance of the full wall.
- Check solid wood for stability before marking the holes. Visible cracks, loose knots, or uneven areas can complicate drilling and fastening. Avoid placing holes close to a defect or edge, where the remaining wood may be more prone to splitting. Mark the layout, then check each position against the grain and condition of the panel.
Wood can change shape as its moisture content changes. A warped panel may leave the peg face uneven and disrupt the display's alignment. Choose sound, flat material and keep its storage and installation conditions consistent. These steps help maintain a clean surface around the drilled openings.
- Coordinate the finish with the room and the bottles. A clear finish keeps the wood grain visible, while paint or stain can complement nearby cabinetry. Test the finish on a small area or sample first. The same wood can look different under cellar lighting than in a bright workshop.
Plan the finish around the installation sequence. Drilling, handling, and fastening can mark a finished surface, so decide which areas to finish before mounting. If the display will sit beside cabinetry, compare the panel's color and sheen with the cabinetry. A sample helps the backing feel integrated with the room rather than like a separate insert.
- Match the panel design to the collection while keeping the peg layout in view. Light-toned wood can make dark metal hardware stand out; a darker stain can create subtler contrast. Either can work if labels and bottle shapes remain easy to see. Apply the finish evenly around holes, where exposed edges can draw attention.
For a coordinated custom display, connect material, finish, and peg placement in one plan. A wine-cellar design plan can help bring those choices together with the surrounding space. Decide on the visual effect first, then carry that choice through the panel surface and installation details.
Custom wine peg panels
A custom panel lets the peg layout follow the wall and the way you want to display bottles. Plan the panel dimensions, peg positions, and installation sequence together.
-
Attach Pegs to the Solid Wood Panel
Lay out each bottle position before drilling, then mark the paired peg locations. Each bottle rests on two pins, one beneath its base and one beneath its neck. For label-forward storage, position the supports so about two-thirds of the bottle's weight rests on the base peg and one-third on the neck peg. This arrangement helps the pair support the bottle horizontally.
Make the openings accurately with a drilling jig or CNC machine, especially across a large panel. If the pegs are screwed on from behind, leave access to the back during installation unless the system uses an Ultra Insert. Some pegs extend 5.5 inches beyond the panel when 3/4 inch of a 6.25-inch peg enters the hole. Use the peg's actual insertion and projection requirements to place it correctly.
Work from a full-size layout rather than measuring each hole independently. A consistent reference line helps keep paired pins aligned and reduces spacing drift across rows. Check hole positions against the bottle arrangement before drilling. If you move one peg to avoid a marked location, revise its partner too, since a misaligned pair can change how the bottle sits.
-
Plan a Custom Wine Peg Panel
Set the panel dimensions around the wall, intended bottle count, and surrounding features. One planned example uses a panel about 5 feet high and 11 feet wide. Treat those dimensions as an example, not a standard size. A custom wine rack can instead fit a narrower wall, a feature area, or a wine cellar installation with benches below.
Draw the layout to scale before choosing the final hole pattern. For adjacent 750 ml bottles displayed label-forward, about 13 inches between centers is a typical planning reference. Allow at least 5.75 inches vertically between matching peg positions; rows are often spaced about 6 inches. Check that the planned arrangement leaves room for bottle shoulders, labels, and any nearby wall edges.
Decide whether each position will hold bottles single-, double-, or triple-deep. That choice affects the display's projection and how the panel relates to room circulation. Use a drawing or full-size template to review the rows, paired supports, and panel boundaries together. Then transfer the approved marks consistently across the surface.
For a wine cellar, coordinate the panel shape with benches, corners, and adjacent storage before fixing the final dimensions. Note changes in wall width or height on the drawing. A measured plan gives the installer a clear pattern to follow; a CNC machine or jig can help reproduce the marked holes accurately across a broad panel.
Minimum wall and wood thickness
- Use a solid wood backer at least half an inch thick when metal wine pegs screw directly into the panel. This minimum provides a wood surface for the peg to enter. A thinner panel may not offer the same depth for direct fastening, so distinguish panel thickness from any wall finish behind it.
For a large display, plan plywood backing between wall studs so the pegs can be screwed into solid wood. This creates a continuous fastening area, including positions that might otherwise fall between studs. Map the panel and peg layout together, then align the backing with the planned installation points.
- Identify what will support the panel before mounting it. Attach the backing to the wall studs and hold the panel firmly against the wall. Attachment points should support the panel across its width and height, rather than relying on the peg holes alone. This matters especially when the racking spans several wall sections.
For a cellar with a broad display, mark stud locations on the layout before positioning the panel. If a planned peg falls between studs, plywood backing provides wood for the peg to enter. Keep the backing and panel aligned so each peg meets the intended solid surface.
- Distinguish direct wood mounting from other pin options. Acrylic wine pins can mount directly to drywall, masonry, or wood that is at least half an inch thick. That allowance applies to acrylic pins; metal pegs screwed directly into a wood backer require the specified solid-wood thickness. Match the mounting method to the pin type.
For example, drywall alone is not the same as a solid wood panel behind it. If your design uses metal pegs, plan for wood at the fastening locations rather than assuming the wall finish provides equivalent support. A DIY rack made with birch plywood panels measuring two feet square and three-quarters of an inch thick illustrates one panel format, not a universal size.
- Check the support before loading bottles. The panel should sit firmly against its wall support without bowing outward. A wine-peg installation transfers the bottles' combined load through the pegs, panel, and wall attachment, so every part must work as one assembly.
For a large layout, compare the stud and plywood backing positions with the final peg pattern. Confirm that planned screw locations enter solid wood and that the panel is supported across its span. This helps avoid unsupported peg positions and reduces the risk of bending or resonance as the display is used.
How much weight can metal wine pegs hold when mounted in solid wood?
- Estimate the bottle load before choosing the panel and wall support. A full 750 ml wine bottle weighs roughly 2.5 to 3.5 pounds, including about 1.65 pounds of wine. Use the heavier end of that range for a conservative layout estimate. The bottle weight is only one part of the load: the pegs transfer it to the panel, and the panel transfers it to the wall.
For example, 40 full bottles add roughly 100 to 140 pounds across the display. That total helps explain why a solid wood backer and firm wall attachment must be planned as one assembly.
- Count bottles per pair of pins, not just the number of pegs across the wall. In a single-deep installation, two pins support one bottle. In a double-deep arrangement, two pins support two bottles; in a triple-deep arrangement, two pins support three. Multiply the planned bottle count by the bottle-weight range to estimate the load carried by the display.
For instance, a 40-bottle single-deep display uses 40 pairs of pins. The same number of pairs in a triple-deep arrangement supports more bottles, so the total load rises with capacity.
- Distribute the planned load across the panel and its wall attachment. A broad display spreads the load over more area than a small cluster holding the same collection, but the backing still needs firm, even support. Securely anchor the panel to help prevent it from bowing under bottle weight. Check the panel-to-wall connection as well as each peg position.
For a large installation, map the backing support against the full peg layout before loading bottles. An unsupported span can flex even when the pegs are firmly attached to wood.
- Inspect the loaded display in stages. Start with a small number of bottles, then add the rest gradually while watching the panel and its wall connection. Look for outward bowing, movement at fasteners, or changes in alignment. Each pair of pins should support its bottle as intended, while the wood and wall carry the combined load.
Do not treat one peg's performance as the capacity of the entire racking system. Panel material, attachment points, bottle count, and storage depth all affect how weight is distributed.
- Plan with the complete installation in view. A 40-bottle example illustrates how even a compact collection can create a substantial combined load. Include the intended number of bottles per position, the panel's support, and the wall attachment in the same load plan. This gives a clearer basis for designing a display than considering peg strength alone.
Wine Rack Concepts
Wine Rack Concepts helps integrate panel planning into a larger wine-storage design, connecting peg placement with the room, collection, and surrounding racks. If you're planning a custom wine cellar, this broader approach can align the backing panel's appearance and layout with the finished space. The Wall Wine Rack Series and Classic Series offer additional options for organizing a collection.
Turn to Wine Rack Concepts when your panel decision is part of a larger cellar or wine-wall plan, rather than a standalone wood project. Contact Wine Rack Concepts to discuss your wine storage plans.
Shape the Wine Wall Around Your Space
Think of the panel as part of the room's design, not a surface added after the layout is settled. A solid wood backing panel for metal wine pegs can help define the display's character. Consider how its grain and finish will relate to nearby cabinetry, seating, and the cellar's overall style. A cohesive plan gives the wine wall a considered place in the room.
Before moving from concept to installation, bring the room's dimensions, collection plans, and preferred look together in one design. This makes it easier to create an intentional display that leaves room for your vision to evolve.
Your collection deserves a setting that feels distinctly yours. Take the next step when you're ready to bring that vision into focus.
Frequently Asked Questions
What thickness of solid wood is needed to securely mount metal wine pegs?
Choose a solid wood backing panel for metal wine pegs at least half an inch thick when the pegs screw directly into the panel. Treat this as the minimum panel thickness, not the complete wall assembly. The attachment behind the panel matters too. For varied peg positions, map the screw locations and confirm each meets solid wood before finalizing the layout.
Which hardwoods are best for a wine peg backing panel?
No single hardwood suits every display. A solid wood backing panel for metal wine pegs should be sound, flat, and compatible with the finish and surrounding cellar design. White oak is one option for a coordinated wine-storage look. Compare a sample with nearby cabinetry and metal hardware, and avoid visible cracks or loose knots near planned peg locations.
What finish protects a solid wood wine peg panel from moisture and wine spills?
Stain or lacquer can finish a solid wood backing panel for metal wine pegs; choose according to the desired color and sheen. Neither finish is spill-proof. Apply it evenly around drilled openings, where exposed edges may stand out, and follow the finish maker's care guidance. Wipe spills promptly with a soft cloth to help keep the panel clean.
Have an expert help today!
Free 2D wine cellar design